Saturday, 29 September 2018

How to create Duplicate and Copy an Item In Sitecore?


Duplicate An Item.

Copies the item and all content and subitem to the same location in the content tree.

  1. In the content tree, locate and select the item that wants to create a duplicate.
  2. Click on the Home tab, In the Operation Group, Click on the duplicate button or click drop-down button and select duplicate Item and another way to create a duplicate item, You can right-click on the selected item and click duplicate


  3. Enter a name for the new Item and click on ok button.


Now you can edit the new item, add subitems, or move the item to another location.

Copy and Item:
Copies the item and all content and subitem to the same location in the content tree you specify.


  1. In the content tree, locate and select the item that wants to create a copy.
  2. Click on the Home tab, In the Operation Group, Click on the Copy To button and another way to create a Copy item, You can right-click on the selected item and click on Coping then Copy To.


  3. In the Copy-Item To dialog box, select the location where you want the copy the item to be stored.

    Note: You can navigate to the location through the content tree on the Browse tab, or you can search for the location on the Search tab.

  4. Click Copy to create a copy of the item in the specified location.


Now you can edit the new item, add subitems, or move the item to another location.

Check the markup of a Webpage


You can check the markup of your web pages by sending all the HTML fields to a W3C HTML Validator.
To send all the HTML fields to a W3C HTML Validator:
  1. In the Content Editor or the Experience Editor, navigate to the relevant item or page.
  2. To check the markup of your web pages:
    • In the Content Editor, on the Review tab, in the Proofing group, click Markup.
    • In the Experience Editor, on the Home tab, in the Proofing group, click Markup.
The result of the check opens on a webpage, where you can see detailed notes and potential issues.

Validate an item


The Sitecore field validators are a set of user-input validators that can be applied to an item, a specific field type, or a specific field on an item.

The Content Editor validates the fields automatically. If there are fields that contain validation errors or warnings, a red bar appears to the left of the relevant field and in the validator bar, the icons change to red or yellow depending on the type of error. To see the details of the errors, move your mouse over the individual icons in the validator bar.

  1. Navigate to /sitecore/system/Settings/Validation Rules/Field Rules and create folder and Right Click on Folder select  copying, select copyTo than open new Popup and select /sitecore/system/Settings/Validation Rules/Field Rules/Sample/Max Length 40. For Example : Validate MaxLenght 5 on field.


  2. Rename the item and fields of validation like this.


  3. Navigate to the Template and select which filed are you apply the validation rule. 
  4. Go to the validation Rule sections and inherit validation rule which you apply. For Example max length 5.


  5. There are four types of validation in Sitecore :


    a. Quick Action Bar
    b. ValidationButton
    c.Validation Bar 
    d WorkFlow
  6. Create an Item base on Template and fill data and show Error Message.


  7. In the Experience Editor, you can set up Sitecore to run the validation check on your pages every time you click Save:
    • In the Experience Editor ribbon, on the View tab, in the Enable group, click Field validation.
    • In this way, when you make changes to a page and click Save, the validation check runs through all the fields on the page. If there are fields that contain validation warnings or errors, the fields are highlighted with a color-coded dotted line according to the warning or error type and a notification appears with more details.
  8. In the Content Editor and the Experience Editor, you can run the validation test manually and view the details about the validation test in the Validation Result dialog box.
    To run a validation test manually on an item:
    1. In the Content Editor or the Experience Editor, navigate to the relevant item or page.
    2. To run the validation test on your item or page:
      • In the Content Editor, on the Review tab, in the Proofing group, click Validate.
      • In the Experience Editor, on the Home tab, in the Proofing group, click Validate.
    In the Validation Result dialog box, you can see an overview of the results of the validation and suggestions for change. The possible values are:
    • Valid (green) – no action is needed.
    • Suggestion (yellow) – look into the issue and decide if an action is needed.
    • Warning (orange) – act on the issue.
    • Error (red) – this is an error.
    • CriticalError (red) – the warning appears before you save the changes.
    • FatalError (red) – you cannot save the item before the error is corrected.


Tuesday, 25 September 2018

Standard Values in Sitecore


What is the standard value in Sitecore?


Standard values were first introduced in Sitecore 5.3 to overcome some of the issues experienced with the predecessors of standard values – “Masters”. In Sitecore 6 masters was completely removed and the concept of standard values took over.

Standard values are a way of having the default or fallback values for fields in Sitecore, meaning that when items are created, you can specify a field value that should be used by default. This does not only account for custom fields you build but also standard fields in Sitecore such as presentations and insert options. This means that you can specify a value on the standard values, and when you create a new item which inherits from this template, it will by default use the values specified on the standard values.

How to create Standard Values in Sitecore?

You create standard values on the given template you want to add standard values for. Go to the template and click the options tab then click the standard values button.


If the options tab doesn’t appear, when you have selected the template, this is probably because you haven’t selected the builder tab, as it is only when this editor tab is selected that the contextual ribbon will occur.


Now that you have clicked the Standard Values button, there will automatically be created a subitem to the template called “__Standard Values”. This item is based on the template you created it from, and it is as such an actual item. You can change any field in this item, and then this will be the standard value for every item based on this template.


Tokens in Standard Values

It is possible to enter tokens in the fields on the standard values, and then these will be replaced with other values when the item is created. For instance, you can let the name of an item be filled into a title field. This is done by entering the token $name in the field:


By default there are the following tokens available in Sitecore:
  • $name: The name of the item
  • $id: The ID of the item
  • $parentid: The ID of the parent of the item
  • $parentname: The name of the parent of the item
  • $date: The system date (yyyyMMdd)
  • $time: The system time (HHmmss)
  • $now: The date and time (yyyyMMddTHHmmss)

Monday, 24 September 2018

Bind the layout and the message template


To bind the layout to the message template:

  1. Navigate to the /Sitecore/content/Home and Insert "insert from Template" and select Template which you have created. for example, Data and give the Item name HomeData.


  2. Click on Insert Button.
  3. Select HomeData and navigate to the presentation Tab and click on Details in the layout Group.
  4. In the Layout Details dialog, for the Default device, click the [No layout specified] link.


  5. In the Device Editor dialog, on the Layout tab, click the drop-down menu and navigate to the layout that you created, for example, NewLayout.

  6. On the Controls tab, add the relevant controls. As a minimum, in /Sitecore/layout/Renderings/test, add the control Set Page Title.
  7. Click Ok.

How To Create MVC Layout In SiteCore


To create the layout of your message template:

  1. In the Content Editor, navigate to /Sitecore/layout/Layouts and Insert The New MVC Layout, For Example, NewLayout.


  2. Click Next, Next Button.

  3. Select Folder Where to want to Create a NewLayout.cshtml page.

  4.  Click on the Create button and Close.
  5. You can see In Path Field "/Views/Shared/NewLayout.cshtml"  because I have saved the layout of the same location.


How To CreateTemplate In SiteCore


Create a new template to specify the standard values that you want to use as the default message content.

To create a template:
  1. In the Content Editor, navigate to /Sitecore/templates and if you want to create a template in the specific folder than Insert Template Folder, for example, Custom Folder. Click OK.

  2. In the template folder, insert a new template, for example, "Content Template" and click on Next Next and close button.

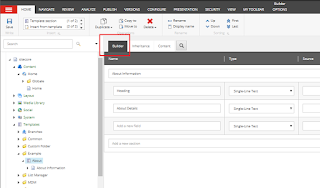
  3. For your new template, click the Builder tab, and then add the relevant data template fields in the Add a new section field, for example, Student Information and Parent Information.


  4. Save your changes.

Sitecore Publishing Service 7.0 Installation Guide

  About the Publishing Service module The Publishing Service module is an optional replacement for the existing Sitecore publishing methods....