Showing posts with label personalization. Show all posts

Wednesday, 4 August 2021

Associating Campaign Activities with Sitecore Form submit

Part - 1 Sitecore Campaign
Part - 2 Campaign Creator in Sitecore
Part - 3 Associating Campaign Activities to pages

Associating Campaign Activities with Sitecore Form submit button:

  • On the Sitecore Launchpad, click on Forms.
  • On the landing page, click Create button.
  • Design your Forms and select the submit button filed.
  • Scroll down to the General section, click on the "+" icon and select the "Trigger Campaign Activity".
  • It will open the modal popup and select the Campaign which have you created and click on the "Ok" button.


  • Now you can see the selected Campaign, Click on Apply button and publish the forms.
  • Now you can visit your page and once submit your forms then it will update the Analytics dashboard and you can see the number of visitors.


Part - 1 Sitecore Campaign
Part - 2 Campaign Creator in Sitecore
Part - 3 Associating Campaign Activities to pages


Saturday, 31 July 2021

Goal Trigger on forms submit


Goal Trigger on forms submit:

  • Create a Sitecore form.
  • Select Submit button.


  • Click on the "+" icon and select the "Trigger Goal".


  • It will open the modal popup and select the Goal which has you created and click on the "Ok" button.


  • Now you can see the selected goal, Click on Apply button and publish the forms.


  • Once you submit the forms then it will update the Analytics dashboard.


Associate a goal with page items


Associate a goal with page items:

You can associate a goal with a content item in the Experience Editor or in the Content Editor. You use the Media Library or Content Editor to associate a goal with a media item.

To associate a goal with an item:
  • From the Sitecore Launchpad, open the Experience Editor or the Content Editor, then navigate to the relevant content item.
  • In the Attributes group, click Goals.
    • In the Experience Editor, this is located on the Optimization tab.


    • In the Content Editor, this is located on the Analyze tab.


  • In the Goals dialog, select the goal that you want to associate with this item and click OK.


Sitecore Goals

Goal

  • Goals are activities that visitors can perform on your website. You create goals to track and measure how visitors engage with the website and campaigns – both online and offline.
  • All goals are events, but not all events are goals.
  • Goals can be “tagged” on specific pages on your website.
In this demo, we have to learn how to create goals and associate with Page Items or Goal Trigger on forms submit in Sitecore.

Create and deploy a goal

  • In Marketing Control Panel, in the content tree, click Goals.

  • On the Home tab, in the Insert group, click Goal to create a new goal.


  • In the dialog box that appears, enter a name for the goal.


  • On the Content tab, you can enter more detailed information about the goal, such as engagement value points or a description.


  • Click on the Save button.
  • To deploy the goal, on the Review tab, in the Workflow group, click Deploy.


    Now you can associate the goal with content items and campaigns.
  • To publish the goal, on the Publish tab, in the Publish group, click Publish.


Associate a goal with page items


Email Experience Manager (Automated) - Quick Setup


Email Experience Manager


Use the email experience manager (EXM) to create highly customizable email campaigns and make them both personal and relevant to your customers.

Email experience manager does not support CMS-only mode.

Email Experience Manager (EXM), there are two types of email campaigns and each has a set of templates that contain default content and layout.

  1. Regular email campaign - This type does not have any predefined content or recipients, so you create this type of email campaign from scratch. 
  2. Automated email campaign – This type is used to send a single email to one contact at a time.
Out of the Box, Sitecore enables EXM by default and sets up the Mail Distribution provider as the CustomSMTP provider. However, the provider settings must be set up in order to send an email. This post will dive into how to set those settings. I will explain how to set up the EXM module in Sitecore 9.x for dev machine usage.

1. Custom Email SMTP configuration: To send the email from Sitecore, you just need to configure the SMTP server, I am using MailTrap.io SMTP settings.

  • Set up MailTrap.io account: Mailtrap is a fake SMTP server to test, view, and share emails sent from the development and staging environments. It allows you to test email notifications without sending them to the real users of the application. All emails sent to Mailtrap are held in your Mailtrap inbox where you can test, view, and share with your team. To create an account, visit https://mailtrap.io and signup.

  • Once set up, you can see SMTP settings.

2. The EXM configuration settings: In this section, we will do all required configuration changes.
  • Now go to web.config file of the root folder of the application. Search the key called “eds:define” in the web.config and make sure the value should be “CustomSMTP”.


  • Go to \App_Config\Sitecore\EmailExperience\Sitecore.EDS.Providers.CustomSMTP.config


  • Update the SMTP setting in the smtpSetting node as below.


3. Testing Your MTA Connection: On any Sitecore EXM Manager Root item, there is a Test Connection button in the Content Editor.


Clicking on this button will test your connection to your Mail Transit Authority (MTA). A successful connection to the MTA service will display the following.


4. Email Experience Manager Module: Now as all configurations are done, let’s play with the EXM module in Sitecore, and send your first email from the Sitecore application. Open the EXM module on the Sitecore dashboard.

  • Create the email campaign > Click create > Regular Email Campaign/Automated email campaign. We have created an Automated email campaign for this demo.

  • Once you click on "Automated" then the modal popup opens and you can select the default template or Import your HTML template or you select the exit page item then click on the "Create" button.


  • In the general information tab, you can configure some basic information of the email campaign for example name, description, etc, in the sender section you can configure “from name” and email, which will show in the email box.


  • In the Message tab, we can make the message template what looks like in the mailbox.

  • In the Delivery tab click on Activate to activate the campaign.


Saturday, 10 August 2019

Create a custom personalization rule


Here are the steps to create a custom personalization rule:

  1. Register the tag
    First of all we need to create a new tag item under /sitecore/system/Settings/Rules/Definitions/Tags


  2. Register a new rule element
     Create a new element folder in /sitecore/system/Settings/Rules/Definitions/Elements


  3. Create a new personalization condition rule


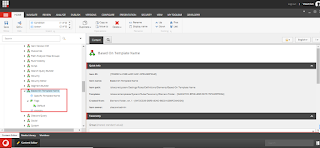
    Here I’m creating a new rule and calling it “Specific Template Name” which will do what exactly that, checking if the current context item is based on a specific template name – not really useful in the real-world scenario but this post is about how to set up a custom personalization rule.
    In the newly created rule, we need to set the Text and Type fields
    The text field contains the text that we’re going to present to the content author, here’s the following text that I use

    where the current template name [OperatorId, StringOperator,,compares to] [Value,,,specific value]

    the [TemplateName, StringOperator,, compares to] represents the format of input that we want to get from the content author. It follows the following format
    • OperatorId defines the public property of the class where we want to assign the value coming from the content author input
    • StringOperator, the built-in macro that we want to use to get the input from the user. In this case, this will be a string comparison operation
    • blank, this parameter will depend on the type of macro that we use, this could be a default text value if we are using the default macro,  it could be a default start path if we’re using the Tree macro  – think of it like setting a field source when we’re building a template in Sitecore. A full list of macros can be found in /sitecore/system/Settings/Rules/Definitions/Macros
    • compares to, the last parameter is the text representation that we want to show to the content author, this value is clickable and when clicked Sitecore will display the appropriate input control based on the macro that we set on the second parameter
    The Type field is the full assembly name of the custom class that we want to use to perform the logic behind this personalization rule
  4. Assign our custom element default tag definition to our custom tag

    Of course we  can assign our custom element tag definition to one of the existing tags under /Sitecore/system/Settings/Rules/Definitions/Tags so that it will automatically appear on the content author personalization rule window however if you want to make it obvious which one is your custom ones then I recommend creating your own custom tag and assign it to that


  5. Assign the tag to Conditional Rendering

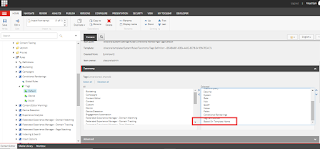
    The last step to make the rule visible for the content author to choose from is to assign our custom tag to one of the default Rules Context folders


    From the picture, we’re setting the tag to the Conditional Rendering rules context which will appear when the user want to personalize a certain component, but you can also some other Rules Context folders such as FXM ones.
    After we assign the tag, we can verify that the custom personalization rule is available for the content author to choose from


Here’s the class that’s responsible to evaluate the custom rule condition


public class CustomPersonlizationRule<T> : StringOperatorCondition<T> where T : RuleContext
    {
        public string Value { get; set; }

        protected override bool Execute(T ruleContext)

        {
            Assert.ArgumentNotNull(ruleContext, "ruleContext");
            Assert.IsNotNull(Tracker.Current, "Tracker.Current is not initialized");
            Assert.IsNotNull(Tracker.Current.Session, "Tracker.Current.Session is not initialized");
            Assert.IsNotNull(Tracker.Current.Session.Interaction, "Tracker.Current.Session.Interaction is not initialized");

            var currrentItemTemplateName = ruleContext.Item.TemplateName;


            return Compare(currrentItemTemplateName, Value);

        }
    }


The class logic is simple and not doing much for the purposes of the tutorial. In a real-world scenario, you can make a rule that reads from a custom database, read a configuration file, call an external API (be careful with this as it will increase page load time).
This may sound like a lot of work at first compared to just creating a custom code in the rendering or similar approach. But when we consider that we’re enabling the content author/marketers to do it by themselves and removing/minimizing the dependency towards IT, it would lessen time to market and open up more possibilities for the marketers of what they can do using the platform.

Sitecore Publishing Service 7.0 Installation Guide

  About the Publishing Service module The Publishing Service module is an optional replacement for the existing Sitecore publishing methods....