Saturday, 31 August 2019

Part - 4 Integrate SonarQube with Visual Studio using SonarLint


Part - 1 SonarQube Installation on Windows
Part - 2 Analyze code Using SonarQube
Part - 3 SonarQube Connect with SQL Server


What is SoanrLint?

SonarLint is an IDE extension that helps you detect and fix quality issues as you write code. Like a spell checker, SonarLint squiggles flaws so that they can be fixed before committing code.

SonarLint an extension you can add to an IDE such as Visual Studio that can provide developers real-time feedback on the quality of the code. It can detect issues in seconds, which can improve productivity. SonarSource describes SonarLint as a capability that can work like a spell checker for text since it detects issues in your code as you go.

In this post, we will be discussing how you can enable SonarLint in Visual Studio to get real-time feedback on the quality of your code. This project assumes that you already have a running instance of SonarQube on a server.


Installation

In Visual Studio, SonarLint is an extension that can be installed by going to the following:
Tools -> Extensions and Updates -> Online
Then in the search box, search for “SonarLint”. Once you see SonarLint, press “Download”.


You must now sign out of Visual Studio to let the changes save properly. VSIX Installer will prompt you to allow for it to modify Visual Studio. After this is completed, you can now use SonarLint for your project.

After the restart of Visual Studio, you should have a new entry in the “Analyze” menu called “Manage SonarQube Connections…”:


Using SonarLint in your project

Open the project you want to connect with SonarQube, click on the following:
Analyze -> Manage SonarQube Connections
A new entry called “SonarQube” will be shown in the Team Explorer window.


(If you don’t have an open project the connect link in the left bottom corner will be grey and inactive. Is this the case, open a project and it will turn into a link.)
Then you will need to press “Connect” to connect to your SonarQube Server. Add in the SonarQube server, username, and password information.


SonarLint will now connect to your SonarQube server and show you a list of your projects:


Now you can tell SonarLint to which SonarQube project your current solution belongs. With that link created, SonarLint can now fetch the project-specific rules from SonarQube. This is the reason we do all that linking and connecting. From now on your changes in the rule set in SonarQube will be synchronised to Visual Studio.
This synchronisation ensures that your Visual Studio only checks what needs to be checked and nothing else.

Analyse your code

You can now analyze your code. You can do this with the following:
Right click solution -> Analysis -> Run Code Analysis
If there are any errors or issue with your code, you will see it in the “Error List” box built into Visual Studio. Moreover, you will be able to see the UI line items directly in Visual Studio. Normally, you would need to log into the SonarQube web application directly to get this information.
Another benefit of SonarLint in Visual Studio is that you will see a helper notify you with errors or warnings as you write code. This allows you to fix code right away in real-time. This can drastically improve efficiency for developers and it will help reduce the time needed for code checks.

Improving code quality

You can write the code as you did before. But now you get a new helper that can warn you while you work.

This doesn’t look like a big improvement, but give it a try. The integration is neat and simple and helps you when you want to listen. Should you want to ignore it you simply close the window – your build server can remind you later on that you should improve that piece of code you just wrote.


Part - 3 SonarQube Connect with SQL Server


  1. First, you need to create a database. Add a new database and name it like "sonar".
  2. SonarQube works with various database systems. For Microsoft SQL Server is the right collation important. Pick one that is case-sensitive (CS) and accent-sensitive (AS) like Latin1_General_100_CS_AS. As see the screenshot.


  3. Click Ok, Now we check the TCP/IP protocol is enabled for SQL Server or not.
  4. Open the SQL Server Configuration Manager and expand the item “SQL Server Network Configuration”. It contains an entry “Protocols for SQLEXPRESS” that needs to be selected. Next, enable TCP/IP in the panel on the right side.


  5. Make sure that the SQL Server Browser service is running. Often it is disabled by default, however for the JDBC driver to work, it needs to be enabled and running. Open the Services management console and find the Service called SQL Server Browser. If disabled, enable it and start the service.


Configuration.

In the installation directory (the place where you extracted the *.zip file) you find a folder named conf that itself contains the sonar.properties file. Here you can configure the various parts of SonarQube. Now add the "sonar.jdbc.url" property with the database name.


sonar.jdbc.url=jdbc:sqlserver://localhost;databaseName=sonar;integratedSecurity=true;instanceName=MSSQLSERVER

sonar.jdbc.username=sonarqube
sonar.jdbc.password=mypassword

Start SonarQube

In the bin folder of the installation, the directory is the start-scripts for the different operating systems. Open the one that matches your installation and execute the script StartSonar.bat to start a console that should stay open.

Open http://localhost:9000 in your browser. SonarQube should be loading and then display you an empty screen:


Tuesday, 27 August 2019

Part - 2 Analyze code Using SonarQube


Part - 4 Integrate SonarQube with Visual Studio using SonarLint


  1. Login SonarQube user interface: http://localhost:9000/sessions/new
  2. Create a Project and given name like "TestCode" as see the screenshot and click on Set Up.


  3. Generate a Token, Click on Generate:


  4. Now See the Generated Token and click on continue:

  5. Select your project's main language as seen in the screenshot and click on Download:

    Note: If you are not downloaded MS Build Sonar Scanner than download and Add path in Environment Variable.


  6. Next, it will give you commands.

  7. Copy all commands and store in some location.
  8. Open the command prompt as administrator and go to project root and run the 1st command.
    SonarScanner.MSBuild.exe begin /k:"TestCode" /d:sonar.host.url="http://localhost:9000" /d:sonar.login="fa711df938cea5515457fb505d693799a42ae936"

    and It will run on project root after the run will show “succeeded” message.


  9. Now Rebuild with MSBuild.exe from the project root.
    Before executing the 2nd command find the "MsBuild.exe" in your system, I am using vs2017 and my location is- "C:\Program Files (x86)\Microsoft Visual Studio\2017\Community\MSBuild\15.0\Bin\MsBuild.exe"

    Execute the command
    "C:\Program Files (x86)\Microsoft Visual Studio\2017\Community\MSBuild\15.0\Bin\MsBuild.exe" /t:Rebuild

    It will take some time and once done will show Total Time Elapsed as see the screenshot.


    Otherwise, you can add the msbuild.exe path in Environment Variable and execute 
    MsBuild.exe /t:Rebuild 


    It will take some time and once done will show Total Time Elapsed as see the screenshot.


  10. Once Rebuild done, it’s time to run the scanner.
    SonarScanner.MSBuild.exe end /d:sonar.login="fa711df938cea5515457fb505d693799a42ae936"


  11. Once all are done, then we can see the project with data in SonarQube instance with some quality reports.

    SonarQube Dashboard


    Project Overview


    Project Issues


    Project Issues Details


    Project Measures


    Project Code path


Par t- 1 SonarQube Installation on Windows


What is SonarQube?

SonarQube is an open-source platform developed by SonarSource for continuous inspection of code quality to perform automatic reviews with static analysis of code to detect bugs, code smells, and security vulnerabilities on 20+ programming languages. SonarQube offers reports on duplicated code, coding standards, unit tests, code coverage, code complexity, comments, bugs, and security vulnerabilities.

SonarQube can record metrics history and provides evolution graphs. SonarQube provides fully automated analysis and integration with Maven, Ant, Gradle, MSBuild and continuous integration tools (Atlassian Bamboo, Jenkins, Hudson, etc.)


Setup SonarQube on windows

  1. Download SonarQube 7.8 Community Edition from here 
    https://www.sonarqube.org/downloads/


  2. UnZip sonarqube7.8 folder


  3. Start the SonarQube Server:

    Got to bin\windows-x86-xx\ directory and run StartSonar.bat file.


  4. Unzip folder in SonaQube location:


  5. Add path in Environment Variable:


Saturday, 10 August 2019

Create a custom personalization rule


Here are the steps to create a custom personalization rule:

  1. Register the tag
    First of all we need to create a new tag item under /sitecore/system/Settings/Rules/Definitions/Tags


  2. Register a new rule element
     Create a new element folder in /sitecore/system/Settings/Rules/Definitions/Elements


  3. Create a new personalization condition rule


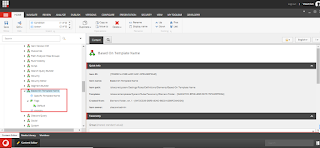
    Here I’m creating a new rule and calling it “Specific Template Name” which will do what exactly that, checking if the current context item is based on a specific template name – not really useful in the real-world scenario but this post is about how to set up a custom personalization rule.
    In the newly created rule, we need to set the Text and Type fields
    The text field contains the text that we’re going to present to the content author, here’s the following text that I use

    where the current template name [OperatorId, StringOperator,,compares to] [Value,,,specific value]

    the [TemplateName, StringOperator,, compares to] represents the format of input that we want to get from the content author. It follows the following format
    • OperatorId defines the public property of the class where we want to assign the value coming from the content author input
    • StringOperator, the built-in macro that we want to use to get the input from the user. In this case, this will be a string comparison operation
    • blank, this parameter will depend on the type of macro that we use, this could be a default text value if we are using the default macro,  it could be a default start path if we’re using the Tree macro  – think of it like setting a field source when we’re building a template in Sitecore. A full list of macros can be found in /sitecore/system/Settings/Rules/Definitions/Macros
    • compares to, the last parameter is the text representation that we want to show to the content author, this value is clickable and when clicked Sitecore will display the appropriate input control based on the macro that we set on the second parameter
    The Type field is the full assembly name of the custom class that we want to use to perform the logic behind this personalization rule
  4. Assign our custom element default tag definition to our custom tag

    Of course we  can assign our custom element tag definition to one of the existing tags under /Sitecore/system/Settings/Rules/Definitions/Tags so that it will automatically appear on the content author personalization rule window however if you want to make it obvious which one is your custom ones then I recommend creating your own custom tag and assign it to that


  5. Assign the tag to Conditional Rendering

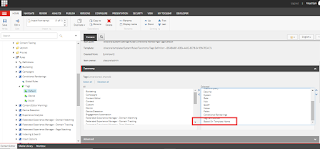
    The last step to make the rule visible for the content author to choose from is to assign our custom tag to one of the default Rules Context folders


    From the picture, we’re setting the tag to the Conditional Rendering rules context which will appear when the user want to personalize a certain component, but you can also some other Rules Context folders such as FXM ones.
    After we assign the tag, we can verify that the custom personalization rule is available for the content author to choose from


Here’s the class that’s responsible to evaluate the custom rule condition


public class CustomPersonlizationRule<T> : StringOperatorCondition<T> where T : RuleContext
    {
        public string Value { get; set; }

        protected override bool Execute(T ruleContext)

        {
            Assert.ArgumentNotNull(ruleContext, "ruleContext");
            Assert.IsNotNull(Tracker.Current, "Tracker.Current is not initialized");
            Assert.IsNotNull(Tracker.Current.Session, "Tracker.Current.Session is not initialized");
            Assert.IsNotNull(Tracker.Current.Session.Interaction, "Tracker.Current.Session.Interaction is not initialized");

            var currrentItemTemplateName = ruleContext.Item.TemplateName;


            return Compare(currrentItemTemplateName, Value);

        }
    }


The class logic is simple and not doing much for the purposes of the tutorial. In a real-world scenario, you can make a rule that reads from a custom database, read a configuration file, call an external API (be careful with this as it will increase page load time).
This may sound like a lot of work at first compared to just creating a custom code in the rendering or similar approach. But when we consider that we’re enabling the content author/marketers to do it by themselves and removing/minimizing the dependency towards IT, it would lessen time to market and open up more possibilities for the marketers of what they can do using the platform.

Sitecore Publishing Service 7.0 Installation Guide

  About the Publishing Service module The Publishing Service module is an optional replacement for the existing Sitecore publishing methods....